OBD code information sheet
https://dvireports.com/p2453
Particulate filter pressure sensor A circuit — range/performance
Technical explanation
The DPF pressure sensor reports implausible values or response. Blocked or split hoses can cause the fault without a failed sensor or filter.
Read the full technical explanation
P2453 concerns the operating range or plausibility of particulate-filter pressure sensor A and its circuit. On differential-pressure systems, separate pipes convey pressure from before and after the filter. A blocked, damaged or incorrectly routed pipe can imitate a sensor fault. The code alone does not prove that the DPF is blocked or that a replacement sensor is required.
Symptoms
Engine warning or a particulate-filter message.
Restricted power when the controller cannot assess filter condition reliably.
Disrupted regeneration or pressure readings that do not follow engine load.
Top suspects — what to check first
Suggested checking order, not statistical failure rates or a confirmed diagnosis. Priority can change with the engine and associated codes.
Blocked pressure hose
Check firstPressure pipes obstructed by deposits or condensate.
Split or reversed pressure line
Check nextCracked, heat-damaged, disconnected or reversed pipes.
Pressure sensor or its wiring
Check nextSensor offset or faulty electrical supply, ground or signal wiring.
Other possible causes
Exhaust leakage
Case-dependentExhaust leaks or genuinely abnormal pressure requiring separate investigation.
All causes in the technical record
Some causes overlap with the shortlist above; this is not a probability ranking.
- Pressure pipes obstructed by deposits or condensate.
- Cracked, heat-damaged, disconnected or reversed pipes.
- Sensor offset or faulty electrical supply, ground or signal wiring.
- Exhaust leaks or genuinely abnormal pressure requiring separate investigation.
How to test — practical steps
Start with simple checks before buying parts. This is not a VIN-specific workshop procedure; keep clear of moving parts, fuel pressure and energized circuits.
- 1
Save associated DPF fault codes
Retain all codes and operating snapshots, including P2452/P2454/P2455, P2002 or P2463 if present.
- 2
Inspect the hose routing after cooldown
Once the exhaust is cool, verify pipe routing and connections against the vehicle diagram.
- 3
Look for blockages and damaged hoses
Inspect hoses and pressure ports for damage or obstruction; do not blow compressed air directly into the sensor.
- 4
Check the sensor offset with the engine off
With ignition on and engine off, check reading offset against the manufacturer's reference.
Detailed tests / equipment needed (advanced)
Perform only tests for which you have the correct wiring diagram, equipment and training.
Test differential-pressure signal plausibility
You need:DPF-capable scan toolOEM-approved multimeter testWorkshop pressure equipment
- Inspect hoses and pressure ports for damage or obstruction; do not blow compressed air directly into the sensor.
- With ignition on and engine off, check reading offset against the manufacturer's reference.
- Compare feedback with controlled test pressure and inspect supply/wiring using suitable equipment.
- Assess DPF loading separately after validating measurement. Perform a specified sensor reset or adaptation only after repair, not as a substitute for it.
What you should see: Results must match the applicable engine-specific test conditions and limits. One reading does not prove a component has failed.
Electrical, fuel, exhaust or timing measurements require suitable equipment and must not be improvised.
Full technical diagnosis — additional checks
Step-by-step diagnosis
ChecksWork through the steps before replacing parts. Adapt the checks to the manufacturer’s procedure.
Retain all codes and operating snapshots, including P2452/P2454/P2455, P2002 or P2463 if present.
Once the exhaust is cool, verify pipe routing and connections against the vehicle diagram.
Inspect hoses and pressure ports for damage or obstruction; do not blow compressed air directly into the sensor.
With ignition on and engine off, check reading offset against the manufacturer's reference.
Compare feedback with controlled test pressure and inspect supply/wiring using suitable equipment.
Assess DPF loading separately after validating measurement. Perform a specified sensor reset or adaptation only after repair, not as a substitute for it.
Components to check
This list does not confirm failed components and is not a replacement recommendation. Verify the fault cause and vehicle applicability first.
- DPF pressure sensor A — inspect.
- Pressure pipes, hoses and ports — inspect.
- Connectors, wiring and exhaust sealing — inspect.
Make- and engine-specific notes
Documented configurations, not proven common defects for all makes or engines. Selecting a vehicle narrows the results.
Context guides without confirmed OEM exceptions
These explain the code for named vehicle configurations, without proving a part is defective or a cause is more common.
Notes are diagnostic leads, not proven faults or disassembly instructions. Do not work on brakes, fuel systems or hot components without proper training.
Check the fuses before ordering a part
An OBD code describes a detected condition; it does not tell you which part to replace. Start with the fuse for the affected circuit.
If the fuse is good, carry on like this:
- Check the relevant supplies and connectionsWhere the diagnostic procedure calls for electrical checks, verify supply, ground and connectors under the manufacturer’s activation conditions.
- Run the specified component testUse the manufacturer’s test for this code and component before deciding it has failed.
- Order only after the fault is demonstratedReplace a part only when the prescribed tests identify it as defective.
Check details
- Identify the circuit and any relevant fuse: Confirm the vehicle, engine, code meaning and stored operating conditions first. A fuse link is a location aid, not evidence that the fuse caused this code. Use the specified type and rating; do not repeatedly replace a fuse that opens.
- Check the relevant supplies and connections: Use the specified engine state, circuit conditions and expected values. Have live measurements performed by someone qualified. For non-electrical faults, follow the relevant mechanical, fluid, pressure or leak checks instead.
- Run the specified component test: Do not apply a generic resistance range. Any resistance or continuity test requires a de-energized circuit and an isolated component, with the correct pins and temperature from the procedure. Some components need a different kind of test.
- Order only after the fault is demonstrated: If results are normal, continue the relevant wiring, control, mechanical or intermittent diagnosis. Check for related faults and verify the repair under the required conditions. A code or a completed checklist alone does not justify replacement.
If the procedure involves airbag/SRS, pretensioners or a high-voltage system, stop DIY testing and use qualified service. Do not probe these circuits with a multimeter.
Vehicle experiences and cases
User-reported cases published after moderation. Approval does not verify the diagnosis; the same code can have different causes.
No experiences have been published for this definition yet. You can be the first to share the checks and outcome.
See all vehicle experiencesManuals, components and vehicle guides
For P2453, locate the section about DPF pressure sensor and associated hoses in the vehicle’s documentation. A fault code alone does not identify a failed part, powertrain or exact schematic.
Vehicle guides covering this code
These vehicles have authored contextual guides; this is not a highest-risk ranking. Confirm generation and engine code before using the procedures.
Manuals open at their original source. Exact diagram availability depends on the build year, engine and manufacturer access.
System and diagnostic diagrams
Conceptual illustrations of the system; verify the actual configuration and tests in vehicle-specific documentation.
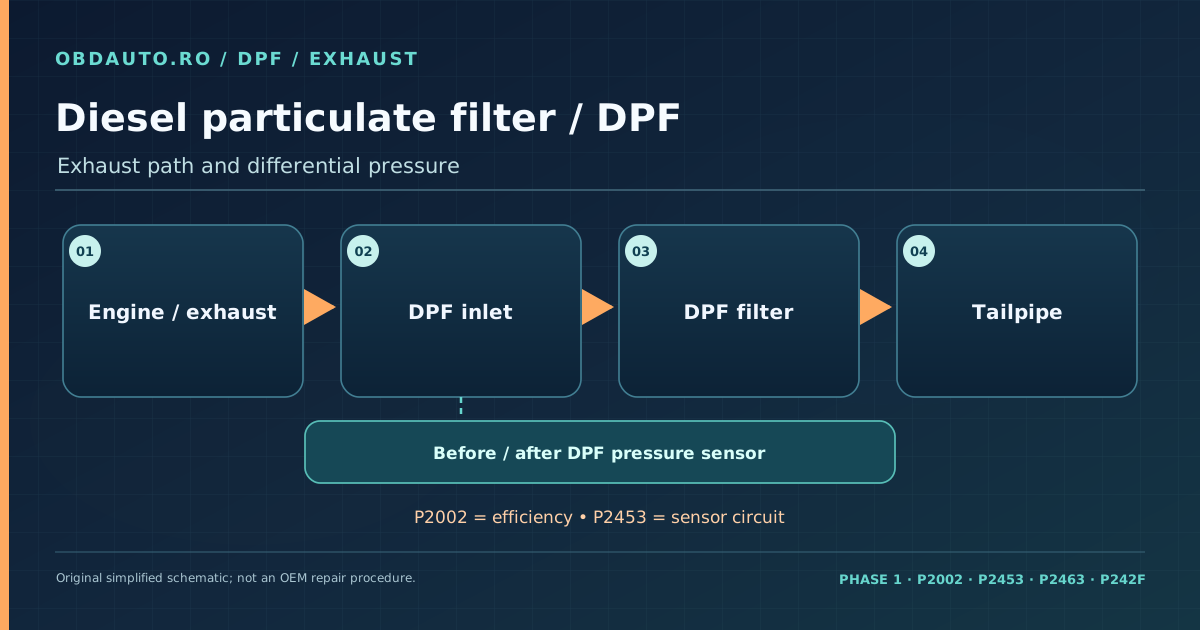
Diesel particulate filter / DPF
Exhaust path and differential pressure. Original conceptual diagram, not an exact component location or an OEM repair procedure.
View full-size diagram →Particulate filtration and pressure measurement
General system guidance · not a confirmed diagnosis
Separate filtration efficiency, soot accumulation and measurement faults; these are different diagnostic conditions.
The association is based on the imported description. This information explains the system; it does not confirm a procedure for the exact code, model or engine. Verify applicability in manufacturer documentation.
Checks for this type of system
- Confirm the definition and related codes before considering regeneration.
- Check sensors and pressure pipes where fitted.
- Request filter-integrity and regeneration-condition assessment.
Useful diagnostic data, where available
- Differential pressure and available temperatures.
- Calculated loading and regeneration history where supported.
Normal values and thresholds vary by vehicle and are not assumed here.
Mistakes to avoid
- Do not command regeneration merely because a DPF code exists.
- Soot and ash are not removed by the same process.
System-guide sources
References support general principles, not individual verification of every associated code.
Continue your research
Links to related systems, warning lights and vehicle examples.
Similar codes
General code
EVAP System Leak Detection Pump Control Circuit/Open
Engine & powertrain
General code
EVAP System Leak Detection Pump Control Circuit Low
Engine & powertrain
General code
EVAP System Leak Detection Pump Control Circuit High
Engine & powertrain
Report a problem
Is this code showing on your vehicle?
See the code meaning and catalogue checks for free. Continue with contextual AI analysis on a PRO plan.
Interpret this code in context.
Describe symptoms, add up to 3 photos and scanner codes if available. Get AI guidance, a PDF and a link for your mechanic — RON 5 / USD 2 / EUR 2 / GBP 1 per case, no subscription.
Vehicle reportsFree: 5 reports a month
Want to send this diagnosis to your customer or keep it in a clean PDF with your logo?
Generate a complete report: OBD codes, findings, photos and recommendations, with your workshop details. You can import the codes straight from a photo of the scan tool.
- Your logo and workshop details
- Import codes from a photo
- Photos and findings
- 13 languages and the customer's currency
5 free reports every month; try it straight away, no subscription.